
Guidance Path - Tactile Paving
Guidance Path Tactile Paving Surfaces are used to guide visually impaired pedestrians along a route.
SureGrip supply a wide range of Surface Mounted Tactile Paving Surfaces. The range benefits from a quick and easy installation process, which does not require heavy lifting or excavation works.
They are available for purchase in packs of ten, each measuring 400mm x 400mm. We offer Buff, Charcoal and Red Colour Options.
We supply nationwide, with next working day delivery as standard. All profiles, colours and sizes are widely stocked - with our specialist tactile adhesive.
Contact Our Customer Service Team via telephone on 01952 583 055. Email us at info@suregrip.co.uk.
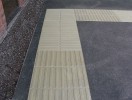
The purpose of the guidance path surface tactile is used to guide visually impaired people along a route when the traditional cues, such as a property line or kerb edge are not available.
It can also be used to guide people around obstacles, for example, street furniture in a pedestrianised area.
The surface has been designed so that people can be guided along the route either by walking on the tactile surface or by maintaining contact with a long cane.
Suitable Applications
-
Where the traditional guidance given by a standard foot-way between the property line and carriageway does not exist
-
Where pedestrians need to be guided around obstacles
-
Where a number of visually impaired people need to find a specific location.
-
In transport terminals to guide people between facilities.
Benefits of Surface Mounted Tactile Paving
Surface Mounted Tactile Paving proves a time and cost-effective alternative compared to traditional concrete slabs.
We supply an industrial-strength adhesive for installing the tactile to the intended surface.
This helps ensure a quick and easy installation process, which does not require heavy lifting or excavation works.
-
Hardwearing & Durable Properties - Proven to be 5x more hard-wearing than concrete.
-
Wear Resistant Characteristics - Extensively tested and offers a 10 year design life, without any risk of tile cracking.
-
Lightweight & Flexible Design - Designed for ease of transport and they are simple to cut on-site to suit your intended area.
Product Options
They are available for purchase in packs of ten, each measuring 400mm x 400mm. We offer three colour options: Buff, Charcoal, and Red.
We supply nationwide, with next working day delivery as standard. All profiles, colours and sizes are widely stocked.
Fixing Method
They can be applied to all common substrates, using our specialist tactile paving adhesive. The tactile adhesive benefits from fast curing and moisture tolerant properties.
One tub of adhesive is suitable for 10 tiles (one box) - or 2.4 square metres.
Technical Specification
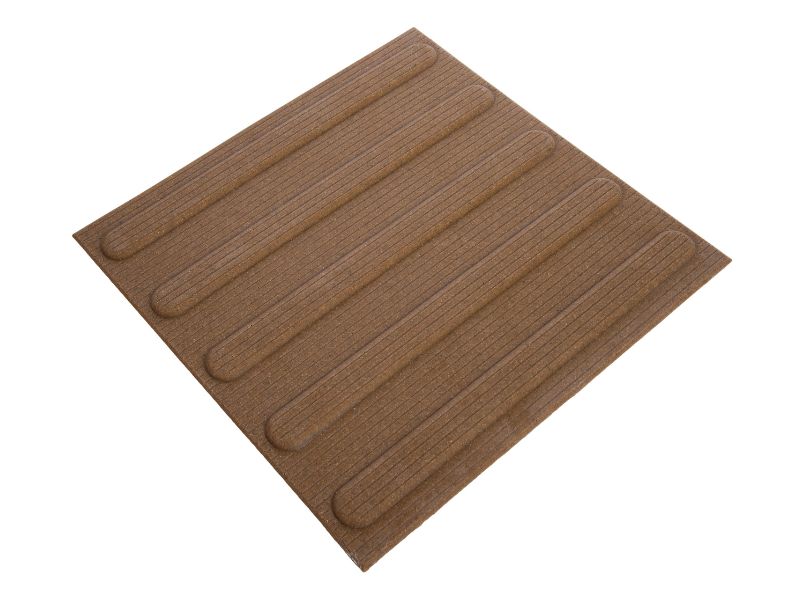
The profile of the guidance path surface tactile comprises a series of raised, flat-topped bars running in the direction of pedestrian travel.
The bars are 5.5mm (±0.5mm) high, 35mm wide, and are spaced 45mm apart.
Product Testing
SureGrip manufacture Tactile Paving Surfaces in the United Kingdom in accordance with ISO 9001:2015 standards.
-
Wear Resistance Test Approval: Assessment for the Determination of Wear Resistance, SATRA Technology Centre.
-
Clean-ability Assessment Test Approval: Clean-ability Assessment of Suregrp Surface Mounted Tactile Paving System, 4-Rail Services Limited.
-
Slip Resistance Test Approval: Evaluation of Slip Resistance to SATRA TM144, SATRA Technology Centre.
-
Extensive Adhesive Strength Testing: Laboratory Adhesive Bond Strength Testing, Building Investigation and Testing.
-
UV (Ultra-Violet) Resistant Product: Tested to confirm UV Colour-Fast Properties.
-
Weathering Test Approval: Freeze/Thaw Tested
Delivery and Payment Methods for Online Orders.
Our experienced technical sales team are on hand to solve your queries, and provide fast quotations.
To obtain a quotation, contact our customer service team via telephone or email. We are open Monday to Friday, 8am to 5pm.
Delivery Methods.
We offer a fast and affordable, nationwide delivery service as standard for all customers.
The TNT Network delivers our consignments on a next working day delivery service. Free Collection is also available from our premises in Telford, Shropshire.
Payment Methods.
SureGRP offer a versatile set of payment options for online orders. We accept all Major Debit and Credit cards. You can also checkout using PayPal.
Alternatively, we accept the following payment methods for pro-forma orders:
-
BACs / Bank Transfer
-
Secure Telephone Payments
-
Sage Pay Online Invoice Payment Link
-
30 Day Trade Credit


